In nature, there are a number of shrubs that are decorative for a long period. Panic hydrangea also belongs to such. Her flowers change color throughout the entire period of development. Big Ben is one of the new varieties of this plant. Find out from the article what the features of this variety are, how to grow it and use it in landscape design.
Grade description
Panicled hydrangea (Latin: Hydrangea paniculata) differs from other flowering shrubs in that its long shoots are decorated with cone-shaped inflorescences - “panicles”. At the bud stage, they are greenish. Then, as they unfold, they become white, acquire a pink tint at the legs and finally become pink. Flowering shrubs begin in July and lasts until September.
Important! Hydrangea can cause mild indigestion when ingested.
Description of varieties Big Ben (Big Ben):
- type: deciduous, straight-stemmed shrub;
- 1.8 m high, 1.7 m wide;
- the shape of the bush: sprawling, voluminous, with good lighting, equally developed;
- shoots: smooth, with a reddish bark in the upper part, in the lower - brown;
- flowers: collected in cone-shaped inflorescences;
- inflorescence height: 30 cm;
- flowering: from July to September;
- leaves: large, egg-shaped, green;
- aroma: very strong;
- Features: reaches a maximum height in 5–10 years;
- winter hardiness: -34 ° C;
- estimated landing site: decoration of flower beds, borders.
Use in garden landscaping
Designers recommend creating a skirt from low bulbs around the bush. For example, crocuses or tulips. They will perfectly shade the green bush until their flowers appear on it.
Hydrangeas can be planted not only in open ground, but also in pots. In this form, they can decorate the gazebo, terrace, relaxation area in the garden. Given the size of the bushes, try buying pots with wheels for them to make it easier to move them. The correct diameter of landing containers is 45-50 cm. In small ones, the earth will dry out too quickly, so they should not be used. Be sure to make holes in them for drainage.

Landing
For planting, you need to choose a place with the right conditions for the development of a seedling. If necessary, stock up with nutritious organic fertilizers: peat, humus or overripe manure. Also prepare a digging shovel, garden hoe, and mulch material. It can be wood chips, sawdust, needles.
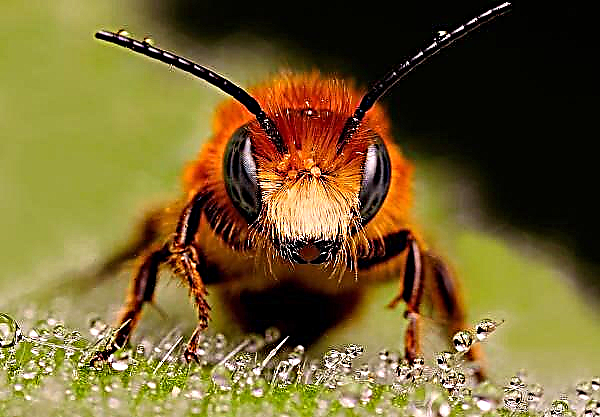
Did you know? The hydrangea scent attracts bees and other pollinators. If you need to increase the attention of honey insects to certain garden crops, put flowering bushes next to them.
Place for growth
Begin pre-planting with site selection. Hydrangeas do not require too sunny areas and can grow in partial shade. Plant a bush in a place protected from winds and early spring frosts.

Given the size of an adult hydrangea, plant at a minimum distance of 0.7–1.5 m between the bushes. If the bush is planted against a wall, fence or other structure, leave a distance of 1 m between them.
Soil preparation
The soil must be loose, acidified, moderately fertile, rich in humus. Hydrangea does not tolerate too dense soils. But it is loyal to the type of soil, which can be either acidic or neutral.
The site selected for landing is dug up to a depth of 30 cm. Lumps of earth are broken and stones removed. To provide the root system with optimal conditions for development, the soil is made loose. If it is dense and clay, then it is diluted with sand.Important! Hydrangeas cannot tolerate bogging. Therefore, make sure that groundwater is no closer than 2 m from the surface.
 To improve fertility, add compost or humus in the amount of 1-2 buckets for each bush.
Departure Dates
Plant hydrangea is better in the spring. Choose a day when the air temperature will be above + 10 ° C, cloudy enough to make the plant more easily acclimatized. Freezing should not be expected on the soil, as this can damage young shoots, which the bush will create very quickly. At moderate temperatures, rooting is more effective. Autumn planting is carried out no later than a month before the onset of frost. But it can only be carried out in the southern regions, where winter temperatures do not drop below -10 ° C.
Landing process
They dig a planting hole a few days before planting. It should be 2-3 times the size of the root ball to provide the roots with a place to spread.
Landing technology:
- Dig a hole. When planting several plants, keep the minimum distance between them at least 70 cm.
- The soil removed from the pit needs to be improved. Dense - dilute with sand, and sand vice versa. Add humus.
- Pour part of the ennobled soil back to the bottom of the pit.
- Set the bush on top.
- Position the root neck at the same distance at which hydrangea grew in the nursery. Therefore, adding or removing soil, raise it to the correct position.
- When pour the soil to half - be sure to pour 1-2 buckets of water.
- Add soil. Seal near the root neck.
- Place a layer of mulch on top. Under the action of moisture during irrigation, it will be crushed and give away the nutrients that it contains in the soil. In addition, it will also inhibit weed growth and drying out of the soil.

Care
Hydrangea care will consist of traditional activities. They include watering, fertilizing, disease and pest prevention. Also, plants need to be pruned periodically and carry out general activities for garden care: harvesting leaves, preparing flower beds for wintering.
Within one or two years after planting and during droughts, make sure that the bushes receive a lot of water. With its lack, the leaves begin to fade. Also, if the soil is rich, then you do not need to fertilize the plants. Sandy hydrangea is best fed once a year in late winter or spring.
Watering and feeding
Plant care includes mandatory watering. Start it in the early spring. The frequency of irrigation should be adjusted to the drying of the topsoil. As soon as you visually fix the dry soil - water. Volume - 1-2 buckets of water for each plant. When deciding on top dressing, pay attention to the condition of the bush. A lush, well-growing bush does not need to be fed. Too much fertilizer will contribute to the intensive growth of foliage to the detriment of flowering. If the plant looks painful, then make a balanced top dressing, where nitrogen, phosphorus and potassium will be in the same percentage. For example, 10-10-10.
Practicing gardeners offer the following fertilizer application:
- in early spring - add ammonium nitrate (source of nitrogen) - 150 g;
- when inflorescences appear, potassium and phosphorus are 50 g each;
- in September - feed with diluted slurry (2 l).
After each dressing, be sure to carry out abundant watering. This will provide accelerated absorption of nutrients.
Video: feeding and watering hydrangeas
Soil loosening
Irrigation promotes weed growth. They are competitors to shrubs in the struggle for nutrients and water. Therefore, be sure to delete them. Also note that the roots of most weeds after removal of the main plant can produce new growth. Therefore, weed them out at the very beginning of development and always remove the roots from the soil.
 Simultaneously with the removal of weeds, the soil is loosened. Thus, the access of oxygen to it is ensured. Air is needed for the development of beneficial microflora. But if there is a layer of mulch in the root zone, then it prevents the growth of grass, and also does not allow the soil to compress and maintains its friability. In this case, you do not need to loosen anything.
Pruning
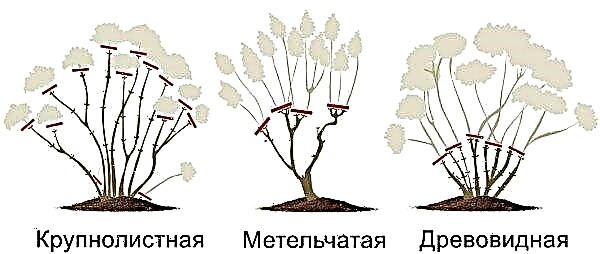
Trimming is a set of activities. This includes the molding of shrubs, and sanitary pruning, and much more. To understand what and when to cut, start by studying information about the features of the development of flowering bushes. Panicle hydrangea blooms occur only on the stems of the new season. Therefore, rejuvenation with the removal of old branches is very useful for this shrub.
With annual growth, the branches stretch out. If there are few shoots, the bush will lose splendor and will look unhealthy. Therefore, gardeners always cut off faded brushes to stimulate further growth and branching. After 5 years of development, the branches exhaust their potential. And they are cut off to stimulate the growth of new ones. To distinguish which branches to cut, remember that the bark of old shoots is darker. Their removal is carried out in February approximately every 3 years. And pruning inflorescences that have faded - as they appear.Important! Remember to use a sterile instrument. To do this, the cutting edges are wiped with alcohol or a solution of whiteness with water, taken in a ratio of 1: 1.
 If the plant is very old, abandoned or damaged, cut all the stems to the base. You will lose flowers in the coming season, but rejuvenate the bush for years to come.
Proper wintering
In autumn, be sure to place a mulching layer around the bush. Its thickness is up to 45 cm. It can be needles, sawdust, bark, leaves. If possible, cover the bush completely, including shoots. To do this, build a grid around it and fill it with straw, needles or leaves. But do not use large maple leaves, as they will retain moisture around the bush and contribute to the development of putrefactive microorganisms.
Gardeners in areas with a cool climate may encounter difficulties, because in the fall the plant lays flowering buds. And despite the fact that the variety will have endurance for zones 4–5, the buds can be damaged by frost during wintering. That means they will not bloom in the summer. Therefore, it is necessary to cover the shrub for the winter as best as possible.

Diseases and Pests
Hydrangeas have a number of serious problems with pests and diseases that affect the general condition of the bushes. Therefore, it is better to take action on time.
Did you know? Hydrangeas symbolize boasting because they give many magnificent flowers, but very few seeds for reproduction.
The main diseases:
- Gray rot or botrix results from infection with a fungus (Botrytis cinerea). Small watery spots quickly become larger. Both brown wilted parts and gray mold (fungal spores) may be present on the leaves. It affects all the aerial parts of the plant. Cool, humid conditions contribute to the spread of the pathogen.

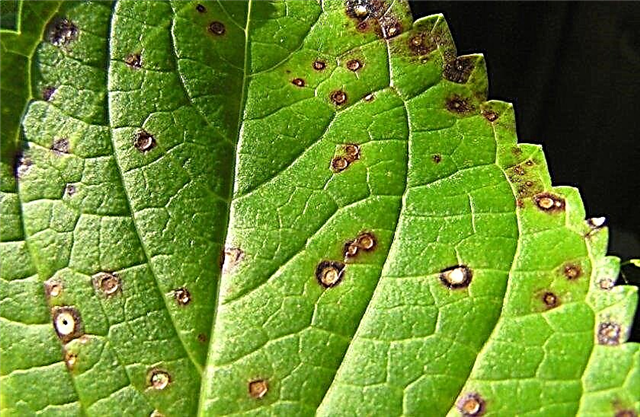
- Cercosporosis - Another fungal disease. It is caused by the fungus Cercospora. The main symptom is red spots with reddish-brown edges on the leaves.
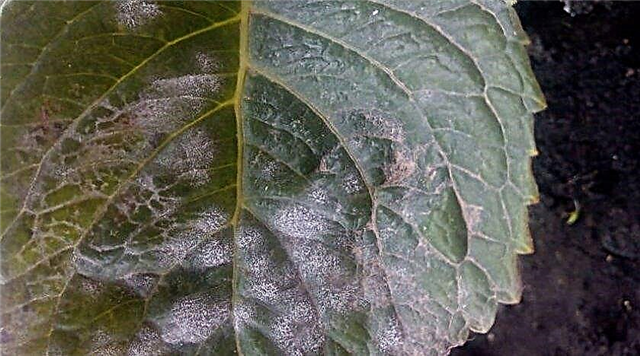
- Powdery powdery mildew (Microsphaera penicillata) can be found in all hydrangeasbut most seriously, it affects large-flowered bushes. In addition to the usual white powdery coating, yellow or purple spots may appear on their leaves. Fallen leaves become carriers of spores.
Other diseases that shrubs can affect are rust (Pucciniastrum hydrangea), bacterial wilting (Pseudomonas solanacearum), and viruses. Their symptoms include leaf spotting, ring or line patterns, and discoloration of the foliage. Hydrangeas can also be affected by insects.
Among them:
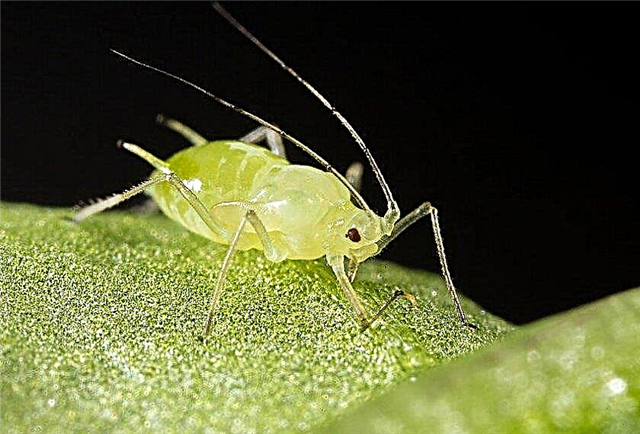
- Aphids - small insects that settle in colonies on young shoots and leaves. They are dangerous because they cause damage to plant tissues, through which fungi and other phytopathogens enter the plant. Aphids also leave behind a sticky sweet coating, on which sooty fungi settle. They do not infect the plant, but block sunlight and disrupt the process of photosynthesis. Aphids are removed by spraying with soapy water. Its concentration can be any.
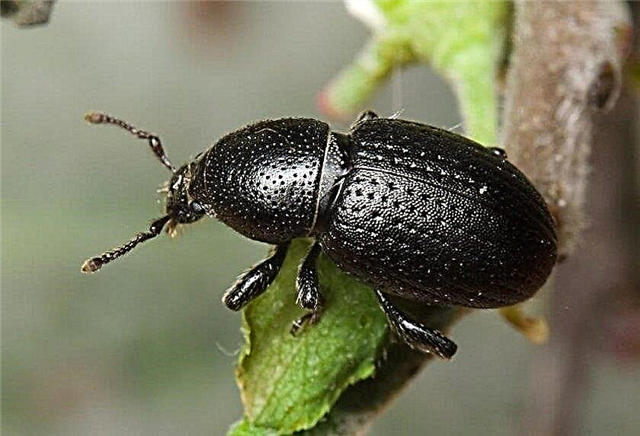
- Black grape weevil (Otiorhynchus sulcatus), or rather, its larvae also injure hydrangea. Larvae eat roots and bark, causing the shoots to dry out.
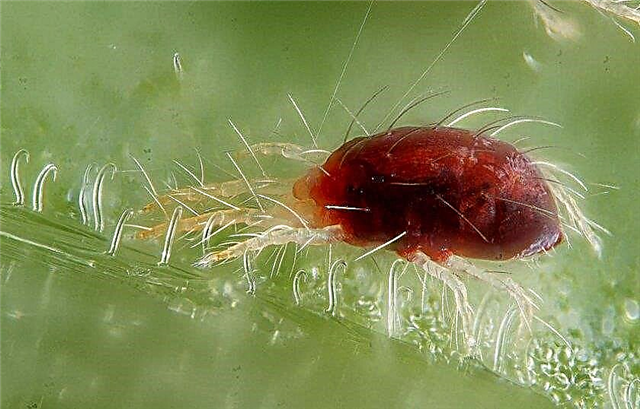
- Spider mites are most active in hot and dry weather. Like aphids, they pierce leaves and suck juice. It is difficult to notice them due to the fact that they settle on the underside of the leaves. To combat this insect, you need to spray Actellik plants.
- If slugs appeared in the gardenthen sprinkle broken shells around the bushes. This eliminates the approaches to the bushes. You can also use Molluscocide.

It is impossible to completely avoid an insect attack. But you need to consider that strong healthy bushes are less likely to be affected and more easily tolerate diseases and the presence of insects. It is also necessary to provide good lighting throughout the bush and air circulation in it. This prevents the formation of large pest colonies.
Did you know? Hydrangea was first grown in Japan. But in North America, archaeologists have discovered ancient fossils of this plant that grew 40–65 million years ago.
Breeding
Hydrangea propagates by cuttings and layering. The easiest way is layering. To do this, just bend and fix the branch on the ground. Then, throughout the season, control the humidity and constantly water the place in which the branch is fixed. Cuttings include the cultivation of seedlings, followed by planting on a permanent place on the site.
Video: three ways to propagate hydrangea
Cuttings
The most commonly practiced method of growing hydrangeas is cuttings. Firstly, a gardener can make several cuttings from one branch. Secondly, in this way it is possible to control the quality of the grown seedlings, feeding them as necessary.
Did you know? Hydrangea flowers can change color. So, on soil with a pH of less than 5.5 they will give blue flowers, above 5.5 — pink. But only some hydrangeas do this. For example, the variety Bigleaf (H. macrophylla) and the species H. serrata.
For propagation by cuttings, you will need to take the following steps:
- Find a branch of this year that has only grown and has not bloomed. It should be a lighter shade than the branches of the previous season and not so harsh.
- Inspect the branch and mentally divide it into several parts. Each length should be at least 13-15 cm. At least 3-4 pairs of leaves must be on each part.
- Tear off the bottom pair from the branch, cutting them close to the stem. The roots will grow from leaf nodes. Therefore, you need to make sure that there are as few leaves as possible in the upper part, and as many points for root formation as possible. And of course, be sure to leave at least 2 pairs of leaves at the end of the branch.
- If the remaining leaves are large, remove half of each leaf by cutting horizontally.
- Dip the bottom of the branch into powder to stimulate root growth and an antifungal composition. You can buy them at any gardening store.
- Now you need a pot of soil mixture. It can be compost, peat and sand, taken in equal proportions. Lower the lower end of the cuttings into the soil, deepening it to the leaves.
- Pour to eliminate air pockets around the seedling.
- Cover the pot with a plastic bag so that it does not lie on the plants, otherwise the leaves will rot. Support it with chopsticks or other similar objects.
- Put in a warm place, protected from direct sunlight and wind.
- Check the condition of the seedlings every few days. If the soil is dry - water. If condensation occurs, ventilate by removing the bag.
 If all goes well, the cuttings will take root in a couple of weeks. In the future, they will grow in their pots before transplanting into the ground. You can check the degree of rooting by gently pulling on the seedling. It should hold tight in the soil.
Layering
Branch propagation is a fairly simple method. It implies that you can select a young branch, bend it to the ground and press it with a metal bracket. Sprinkle with earth on top. After some time, roots will appear from the internodes, and the branch will take root. The new plant for the next year can be separated from the mother and transplanted.

Hydrangea is extremely decorative. It can be recommended to anyone who likes to decorate their garden with flowering plants. Follow the simple rules for caring for the bushes, and they will surely please you with abundant flowering.


